
DIY Window Installation: What You Need to Know Before You Start


Installing your own windows can be a rewarding yet challenging task. Whether you're looking to improve your home’s energy efficiency or update its aesthetic, understanding the process is crucial. Before you grab your tools, there are several key considerations to keep in mind.
Understanding the Basics of Window Installation
The first step in any DIY window installation is understanding the different types of windows available. From double-hung to casement windows, each type has its unique benefits and installation techniques. Make sure to research which style best suits your needs and home design.
Additionally, accurate measurements are critical. Measure the width and height of the window opening at multiple points to ensure your new window will fit perfectly. This step cannot be overstated as improper sizing can lead to leaks and energy inefficiency.
Gathering the Right Tools and Materials
Before you start, gather all necessary tools and materials. Typical tools include a tape measure, level, hammer, screwdriver, and utility knife. You'll also need materials such as screws, caulk, and insulation to ensure a proper seal and secure installation.
Having the right tools on hand will make the process smoother and help avoid unnecessary trips to the hardware store. Preparing a checklist can be a helpful step in ensuring everything is ready before beginning.
Preparing the Workspace
Preparing your workspace is just as important as having the right tools. Clear the area around the window of any furniture or obstructions. Lay down a drop cloth to protect your floors from dust and debris. Safety should always be a priority, so make sure you have proper eye protection and gloves.

Step-by-Step Installation Process
Follow these general steps for a successful DIY window installation:
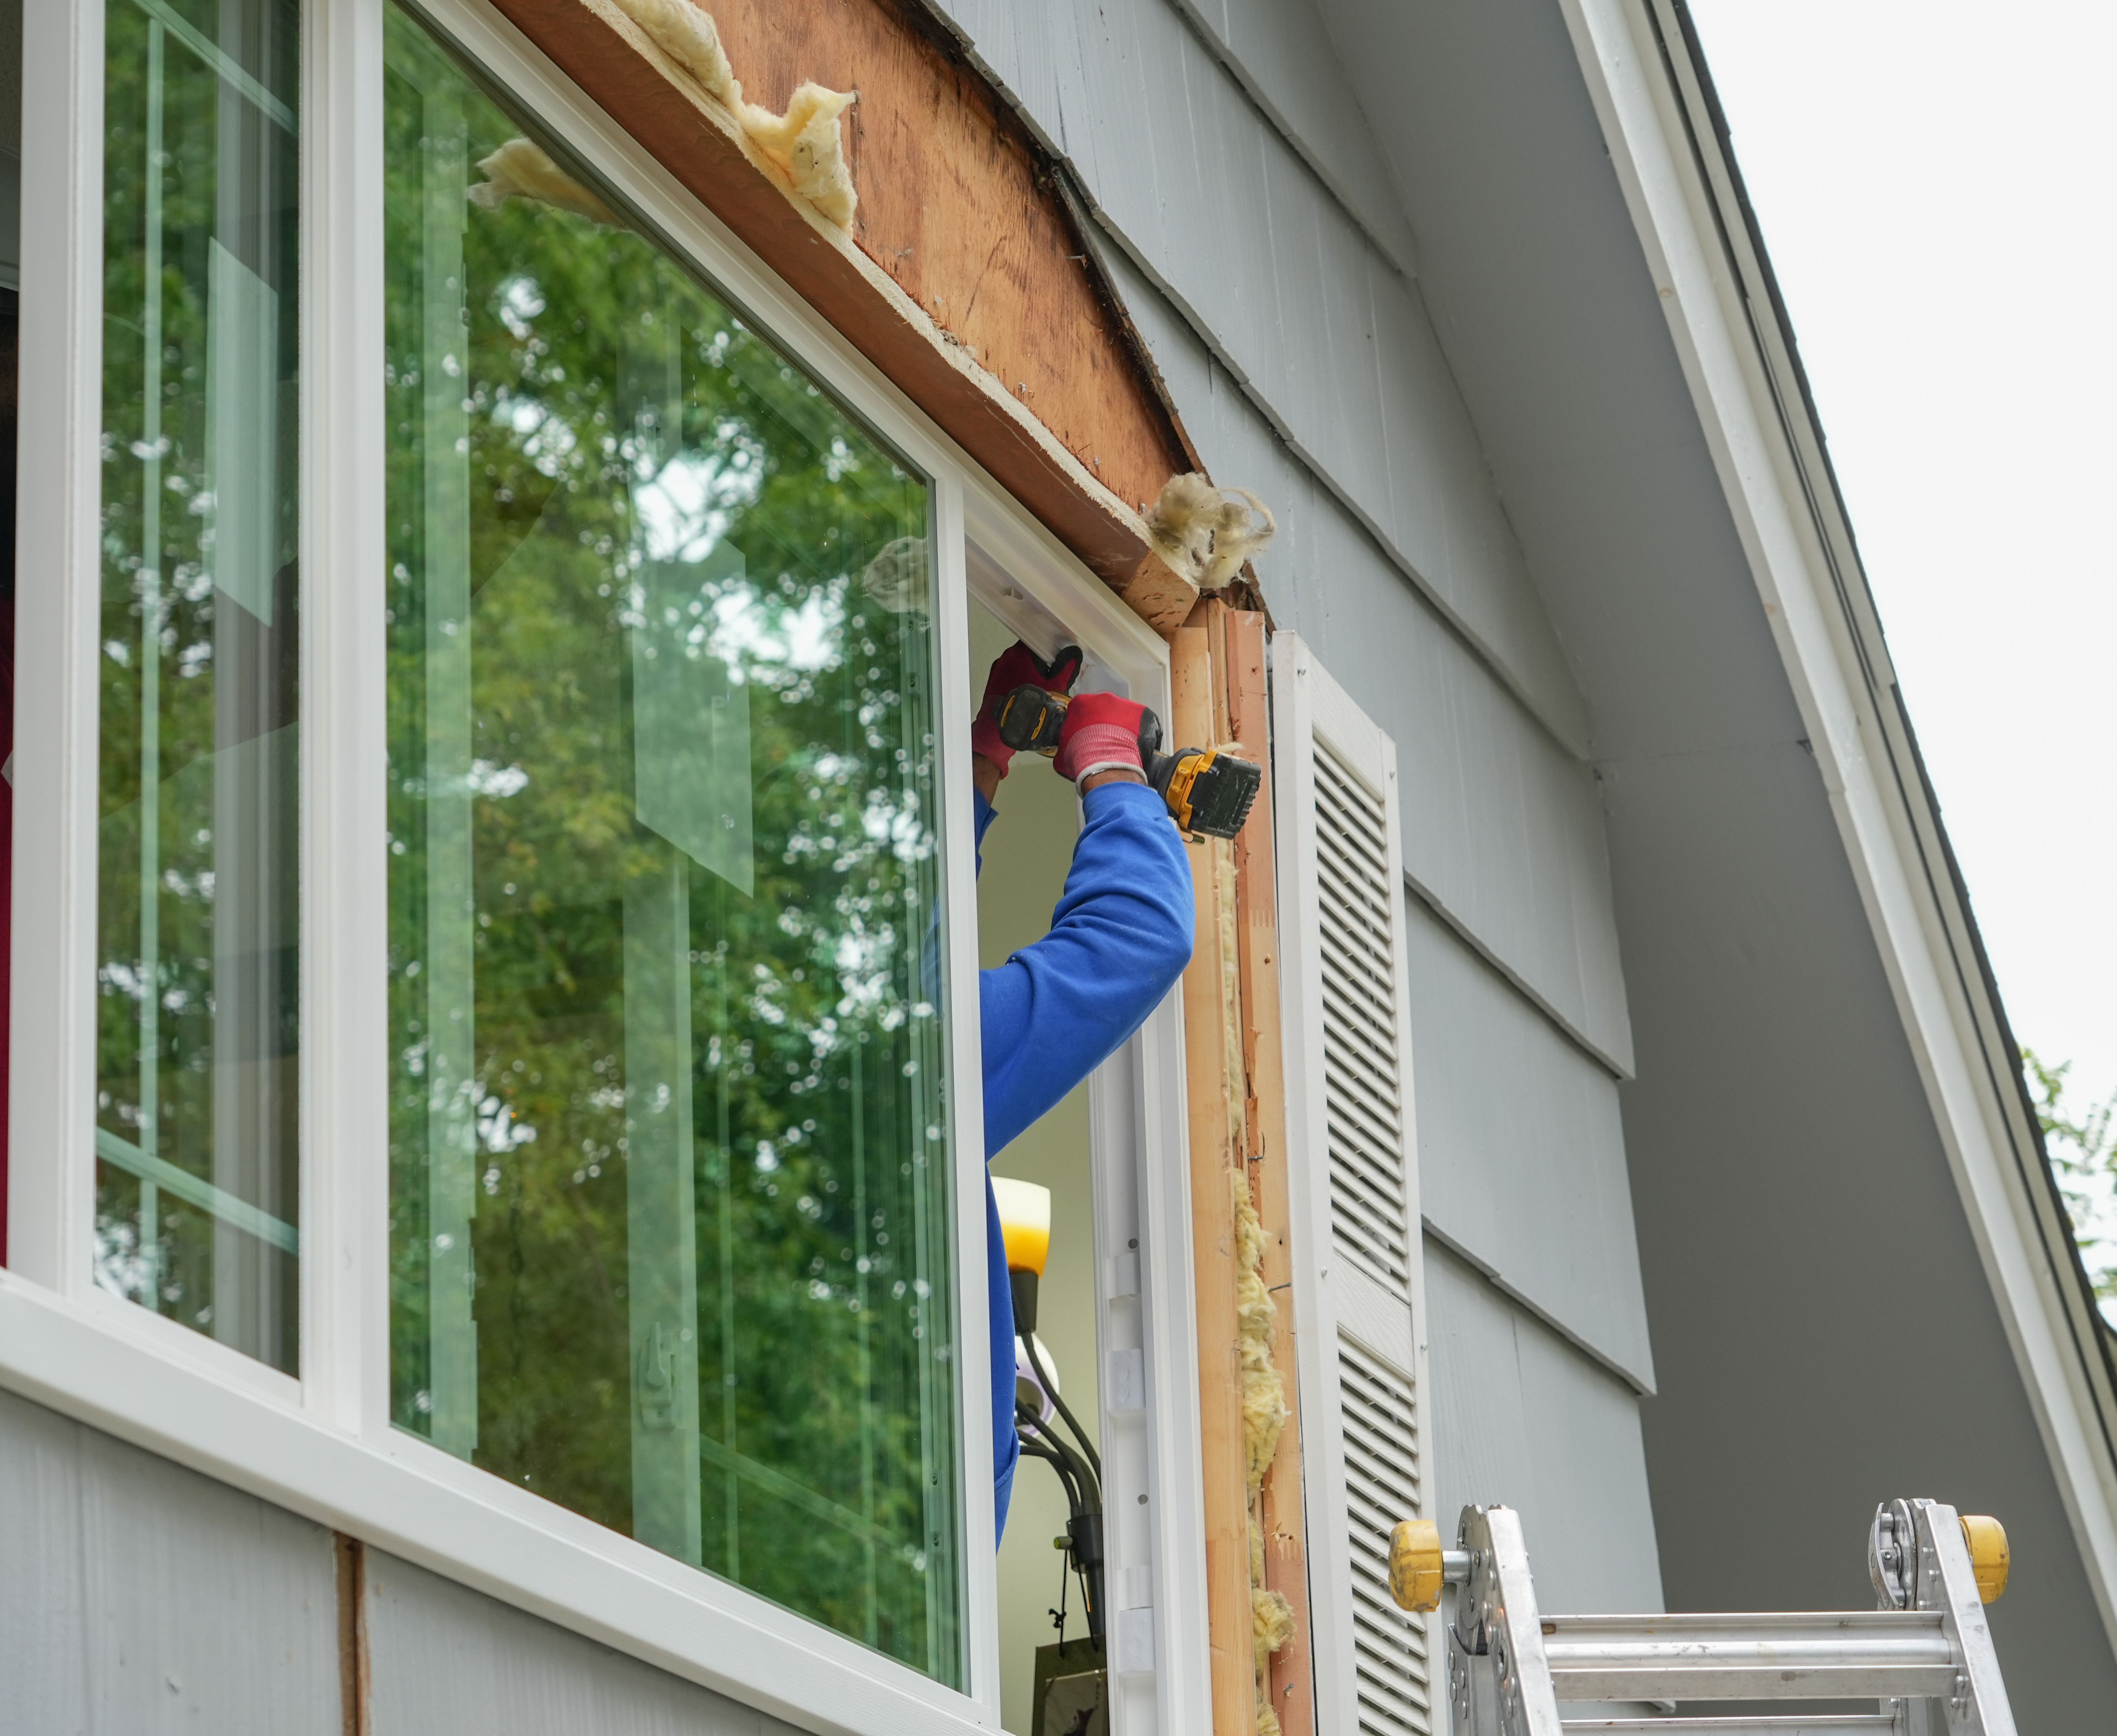
- Remove the old window: Carefully take out the existing window, ensuring you do not damage the frame.
- Inspect the frame: Check the window frame for any signs of rot or damage and repair as necessary.
- Fit the new window: Place the new window into the opening, making sure it is level and plumb.
- Secure the window: Fasten the window according to the manufacturer’s instructions, usually with screws.
- Seal and insulate: Use caulk and insulation to seal gaps and improve energy efficiency.
Final Checks and Maintenance Tips
Once your window is installed, conduct a final inspection. Ensure it opens and closes smoothly and that there are no air leaks. Regular maintenance, such as cleaning the glass and lubricating moving parts, will help your new windows last longer.
DIY window installation can be a cost-effective way to enhance your home. With careful planning and the right tools, you can achieve professional results. Remember, if you ever feel unsure during the process, consulting a professional is always a wise choice.